


In the world of software development, building and deploying applications can be a complex and time-consuming process. However, with the help of modern tools and technologies, this process can be streamlined and made more efficient. In this article, we will walk through the process of deploying an Angular Project using Docker and GitHub Actions.
Creating a Dockerfile
This Dockerfile helps build the Docker image for deploying an Angular web application to a web server.
FROM node:14.17.3 as build

# Create html and workdir
RUN mkdir -p /var/www/html/
RUN mkdir -p /home/myFrontend

WORKDIR /home/myFrontend

# install package.json
COPY package.json /home/myFrontend/package.json
COPY . /home/myFrontend

#Install npm
RUN npm install -g @angular/cli
RUN npm install

# Build
RUN npm run build

# Copy files to html dir
FROM node:14.17.3
COPY --from=build /home/myFrontend/dist/myProject/ /var/www/html/
Let's go through the code above to understand what each line does:
FROM node:14.17.3 as build- This sets the base image to use for building the image as the official Node.js image version 14.17.3, and gives it the name "build".RUN mkdir -p /var/www/html/- This creates a directory on the container file system at the path/var/www/html/, which is where the built Angular application will be copied to later.RUN mkdir -p /home/myFrontend- This creates a directory on the container file system at the path/home/myFrontend, which will be used as the working directory for the subsequent commands.WORKDIR /home/myFrontend- This sets the working directory to/home/myFrontend.COPY package.json /home/myFrontend/package.json- This copies thepackage.jsonfile from the host machine to the container's/home/myFrontenddirectory.COPY . /home/myFrontend- This copies all other files and directories from the host machine to the container's/home/myFrontenddirectory.RUN npm install -g @angular/cli- This installs the Angular CLI globally using NPM.RUN npm install- This installs the dependencies specified in thepackage.jsonfile in the container.RUN npm run build- This runs thebuildscript defined in thepackage.jsonfile, which builds the Angular application and generates the static files in thedistdirectory.FROM node:14.17.3- This starts a new build stage using the same Node.js base image.COPY --from=build /home/myFrontend/dist/myProject/ /var/www/html/- This copies the contents of the/home/myFrontend/dist/myProject/directory from thebuildstage to the/var/www/html/directory in the current stage. This effectively moves the built Angular application from thebuildstage to the final image, ready for deployment.
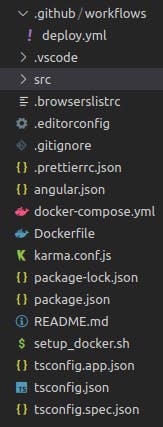
Setting up the Github Workflow Folder
Create a folder named .github/workflows/deploy.yml at the base root of your project as shown below:
Setting up the deploy.yml file
Give your workflow a name and the instruction to trigger the workflow when code is pushed to the Github branch named master.
name: Build my frontend angular project
on:
  push:
    branches:
      - master
Create the jobs that will be executed, in our case its just one job which will help build and deploy the code to the latest Ubuntu server:
jobs:
  build-and-deploy:
    runs-on: ubuntu-latest
In GitHub Actions, uses is a keyword used to specify the action that should be run as part of the workflow. An action is a reusable unit of code that can perform a specific task, such as building and pushing a Docker image to a repository.
Let's go ahead and create the steps that will be undertaken to achieve the build and deploy job.
First step: Access the latest code version
This step will clone the specified repository and make it available for subsequent steps in the workflow. This is a common first step in many GitHub Actions workflows, as it ensures that the workflow has access to the latest version of the code before any other actions are executed.
steps:
   - name: Checkout code
     uses: actions/checkout@v2
Second step: Setup Node.js
Setup Node.js and explicitly use the most compatible version, in this case, it is a node-version that is 16 and above
 - name: Setup Node.js
     uses: actions/setup-node@v2
     with:
       node-version: '16.x'
       cache: 'npm'
Third step: Build and Push the Docker Image to Docker Hub
The uses keyword is used to specify the mr-smithers-excellent/docker-build-push action, which is used to build and push the Docker image to the docker repository. The with keyword provides additional information to the action, such as the name and tags of the Docker image, the registry to push it to, and the Dockerfile to use.
    - name: Build and Push the Created Docker Image to your Docker Repo
      uses: mr-smithers-excellent/docker-build-push@v6
      with:
        image: your-docker-username/myfrontend
        tags: latest
        registry: docker.io
        username: ${{ secrets.DOCKER_USERNAME }}
        password: ${{ secrets.DOCKER_PASSWORD }}
        dockerfile: Dockerfile
The secrets.DOCKER_USERNAME and secrets.DOCKER_PASSWORD parameters are environment variables that store the Docker username and password, respectively. These are specified in the workflow's secrets, which are encrypted and not visible in the workflow code or logs.
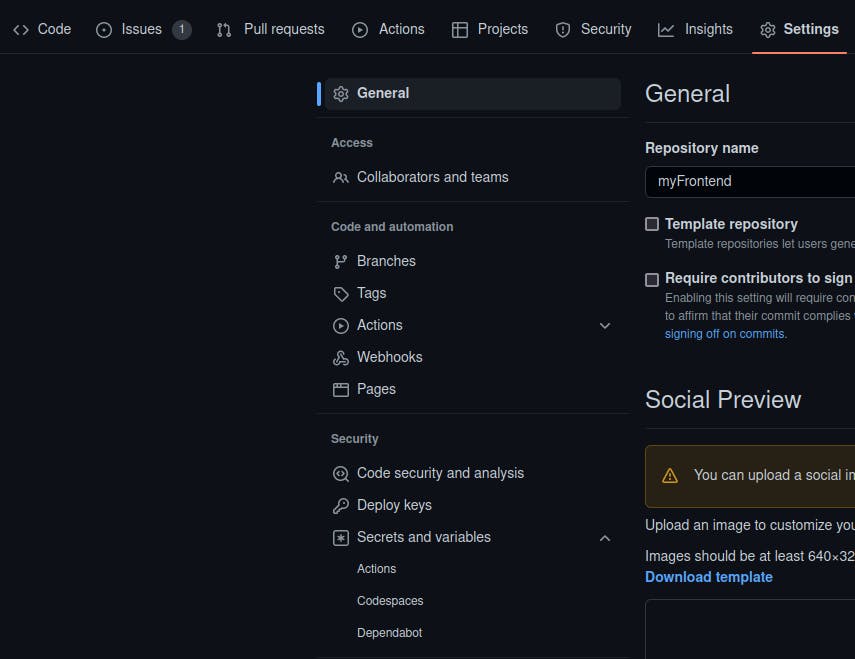
Create the secret variables on your Github repository:
Firstly, ensure you have owner rights to create the secret variables:
Go to: your-repository >> Settings >> Security >> Secrets and variables
Add your variables one by one:
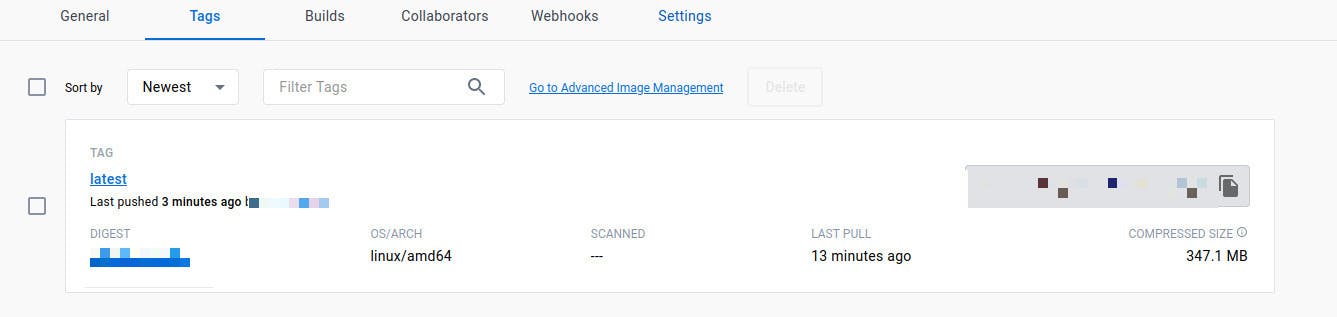
Once the third step is done, you should have a docker image deployed to your docker hub repository as shown below:
Fourth step: SSH into the server and deploy
Here we ssh, that is: "enter" 🙈 the server, pull the built docker image from our docker hub repository and run the image.
  - name: SSH into the server and deploy
    uses: appleboy/ssh-action@master
    with:
      host: ${{ secrets.SERVER_IP }}
      username: ${{ secrets.SSH_USER }}
      password: ${{ secrets.SSH_PASSWORD }}
      script: |
        docker system prune -a
        docker volume ls|grep frontend_volume > /dev/null || docker volume create frontend_volume
        docker stop myfrontend
        docker rm myfrontend
        docker run --rm -v frontend_volume:/data/ ubuntu /bin/sh -c     "rm -rf /data/*"
        docker pull dockerhub-username/myfrontend:latest
        docker run -d --name myfrontend -v frontend_volume:/var/www/html/ dockerhub-username/myfrontend:latest
        docker system prune -af
The code above is explained as follows:
name: SSH into the server and deploy: This Sets the name of the workflow step.uses: appleboy/ssh-action@master: Specifies the action to use, which isssh-actionfrom theappleboyorganization/user on GitHub.with: Specifies the parameters to use with thessh-actionaction.host: ${{ secrets.SERVER_IP }}: Specifies the IP address or hostname of the server to connect to via SSH. The IP address is stored as a secret in the GitHub repository.username: ${{ secrets.SSH_USER }}: Specifies the username to use when connecting via SSH. The username is stored as a secret in the GitHub repository.password: ${{ secrets.SSH_PASSWORD }}: Specifies the password to use when connecting via SSH. The password is stored as a secret in the GitHub repository.script: |: Starts a multi-line script.docker system prune -a: Cleans up unused Docker resources, including stopped containers and unused images.docker volume ls|grep frontend_volume > /dev/null || docker volume create frontend_volume: Checks if a Docker volume namedfrontend_volumeexists. If it does not exist, the command creates the volume.docker stop myfrontend: Stops the running Docker container with the namemyfrontend.docker rm myfrontend: Removes the Docker container with the namemyfrontend.docker run --rm -v frontend_volume:/data/ ubuntu /bin/sh -c "rm -rf /data/*": Removes all files and directories in the volume namedfrontend_volumedocker system prune -af: Removes all stopped images and containers forcefully
Notice:
This example makes use of the nginx service declared in the django backend docker-compose file, therefore, we only need to build the frontend and store the built files in a volume called: frontend_volume that can be accessed and served using the backend nginx as shown below:
  nginx:
    build:
      context: ./prod/nginx
      dockerfile: Dockerfile
    container_name: nginx
    volumes:
      - nginx_conf:/etc/nginx/conf.d/:rw
      - static_volume:/mybackend/static:rw
      - media_volume:/mybackend/media:rw
      - certbot_conf:/etc/letsencrypt
      - certbot_www:/var/www/certbot
      - frontend_volume:/frontend:ro
So, feel free to add nginx to your Dockerfile to help with proxy issues. The full code on deploy.yml will look as follows:
name: Build my frontend angular project
on:
  push:
    branches:
      - master

jobs:
  build-and-deploy:
    runs-on: ubuntu-latest

    steps:
      - name: Checkout code
        uses: actions/checkout@v2

      - name: Setup Node.js
        uses: actions/setup-node@v2
        with:
          node-version: '16.x'
          cache: 'npm'

      - name: Build and Push Created Docker Image to Docker Repo
        uses: mr-smithers-excellent/docker-build-push@v6
        with:
          image: your-dockerhub-username/myfrontend
          tags: latest
          registry: docker.io
          username: ${{ secrets.DOCKER_USERNAME }}
          password: ${{ secrets.DOCKER_PASSWORD }}
          dockerfile: Dockerfile

      - name: SSH into the server and deploy
        uses: appleboy/ssh-action@master
        with:
          host: ${{ secrets.SERVER_IP }}
          username: ${{ secrets.SSH_USER }}
          password: ${{ secrets.SSH_PASSWORD }}
          script: |
            docker system prune -a
            docker volume ls|grep frontend_volume > /dev/null || docker volume create frontend_volume
            docker stop myfrontend
            docker rm myfrontend
            docker run --rm -v frontend_volume:/data/ ubuntu /bin/sh -c "rm -rf /data/*"
            docker pull your-dockerhub-username/myfrontend:latest
            docker run -d --name myfrontend -v frontend_volume:/var/www/html/ your-dockerhub-username/myfrontend:latest
            docker system prune -af
Congratulations🥳🥳, we have successfully created an Automated CI/CD pipeline for an Angular application using Github actions.
Remember, DevOps is not just a job, it's an adventure! So buckle up, keep calm, and deploy on!
For any queries leave a comment or contact me on my socials.
Cheers🥂